How to use PuTTY
Table of Contents
If you are going to use a Windows computer to access your VPS, you are probably going to use PuTTY because it’s the most popular SSH client for Windows.
- Download and install PuTTY (Download PuTTY).
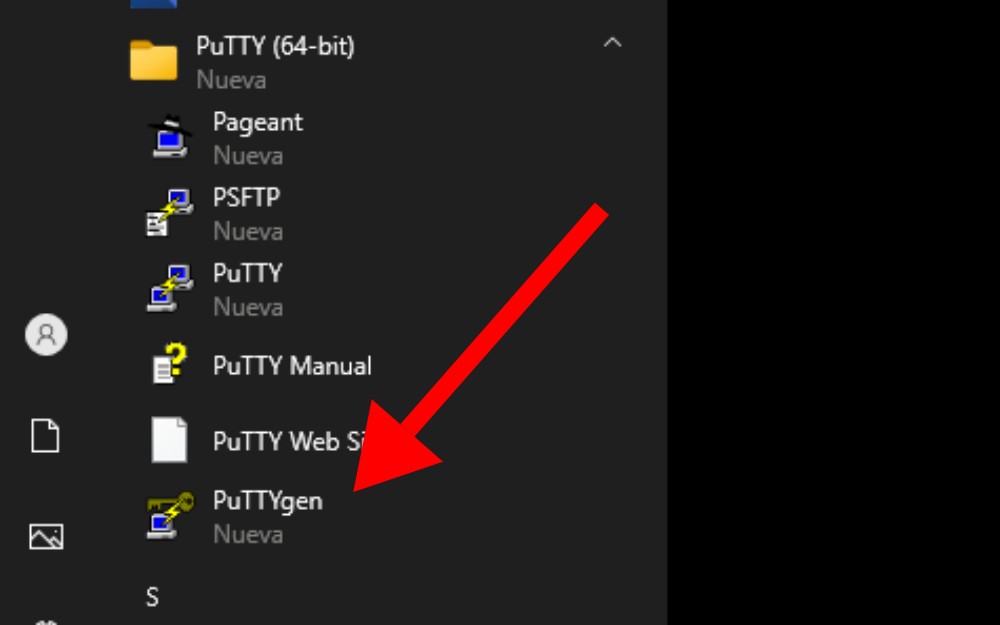
- Check if your private key (if you are using one to connect to your server) is a PEM or PPK file. If it’s a PPK file, skip to step 7, if it is a PEM file, you need to convert to PPK, because PuTTY only accepts PPK files. To do so, open PuTTYgen (it was installed with PuTTY).
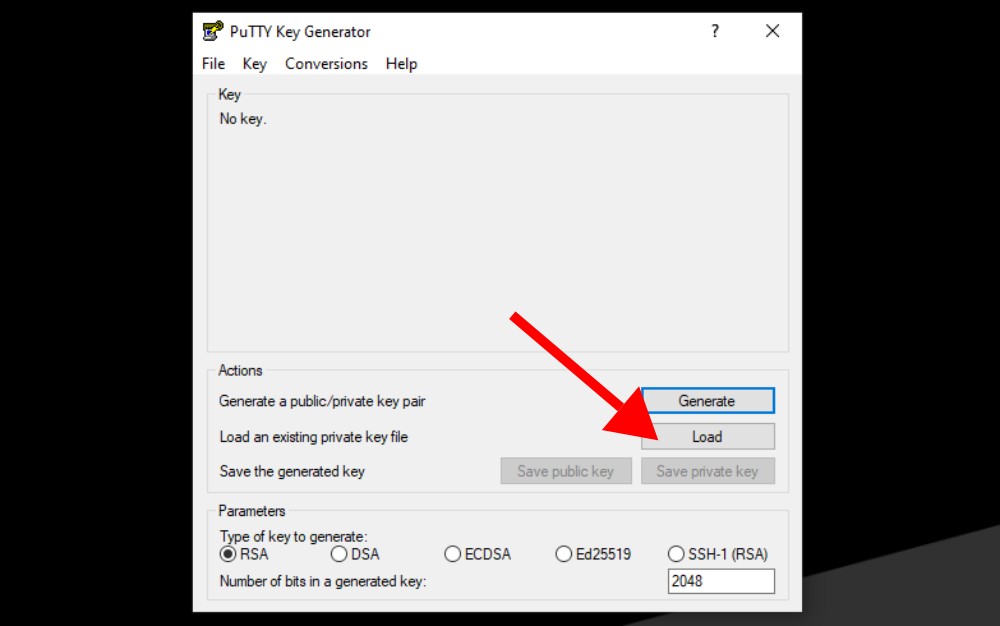
- Click on “Load”.
- Click on “PuTTY Private Key Files” at the bottom-right corner and select “All Files”.
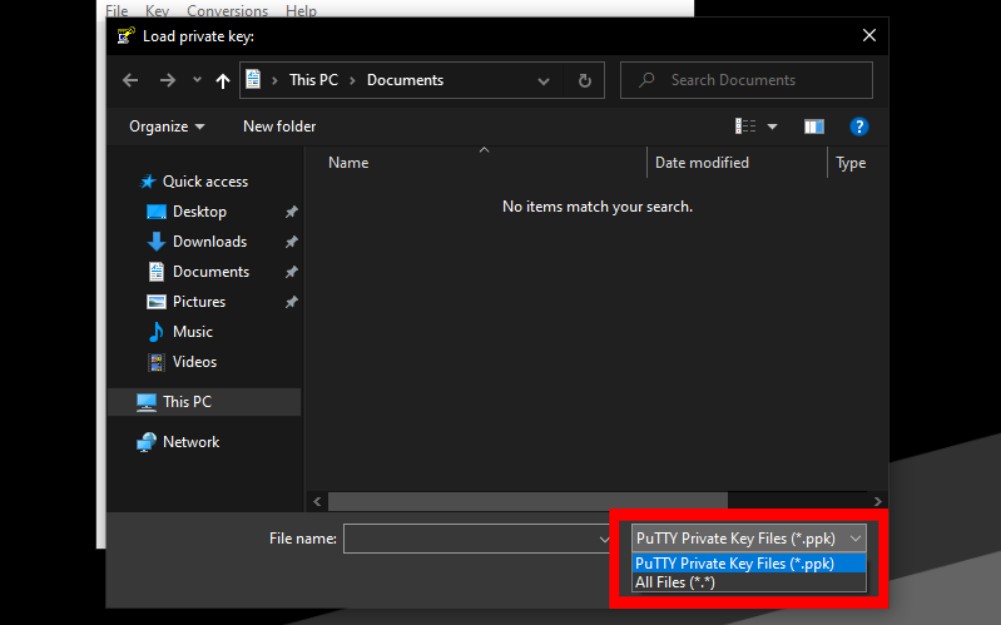
- Select the Private Key and click OK.
- Click on “Save private key”. You can set up a password for the key if you want.
- Open PuTTY.
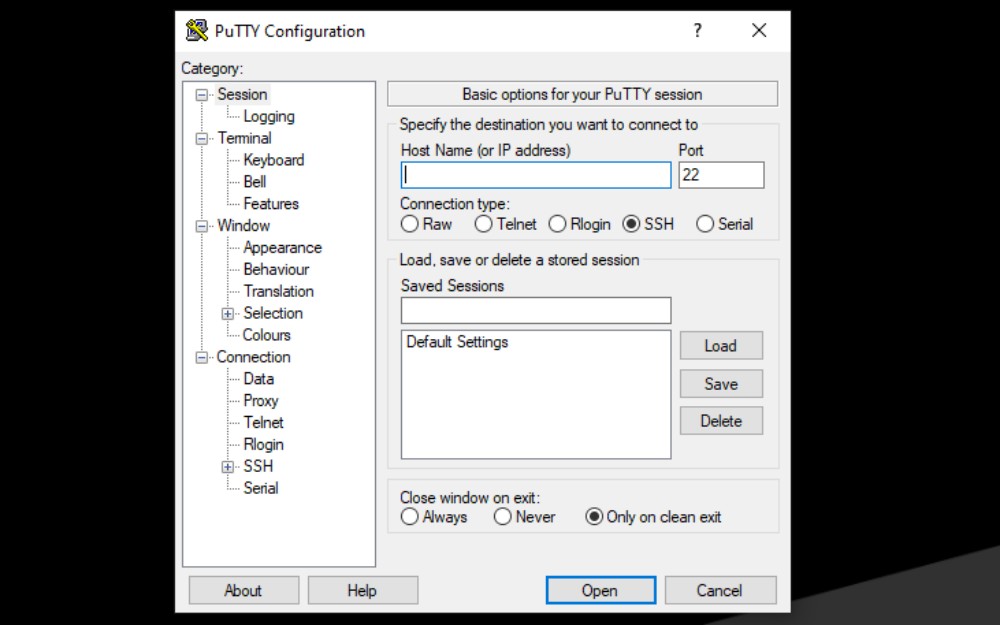
- Type the public IP or the public DNS on the “Host Name” input box.
- On the left menu, click on
Connection > SSH > Auth. - Select your PPK file by clicking on “Browse”.
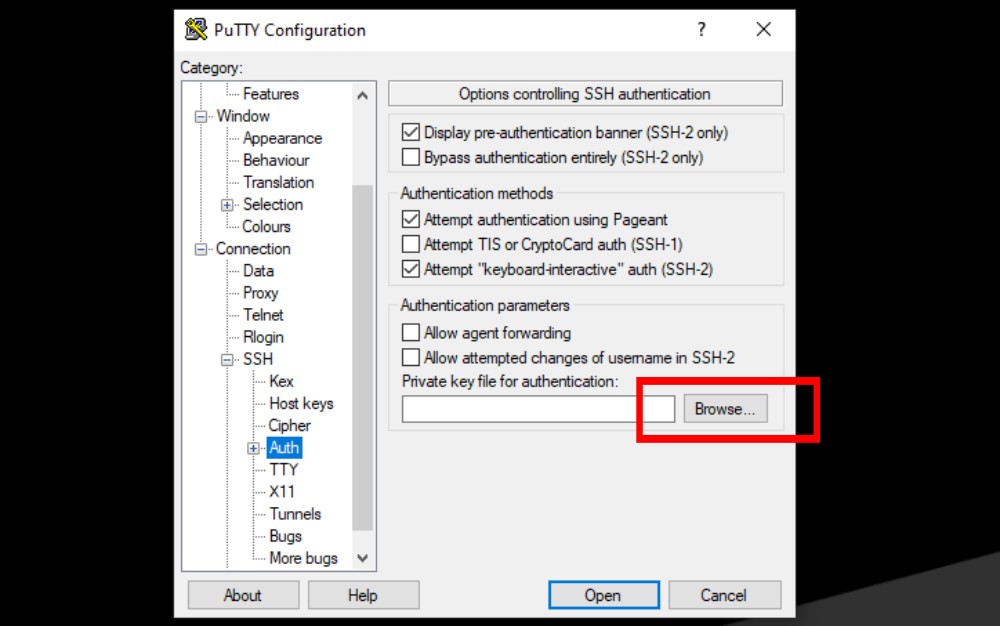
- Click on
Connection > Dataand type VPS username on “Auto-login username”.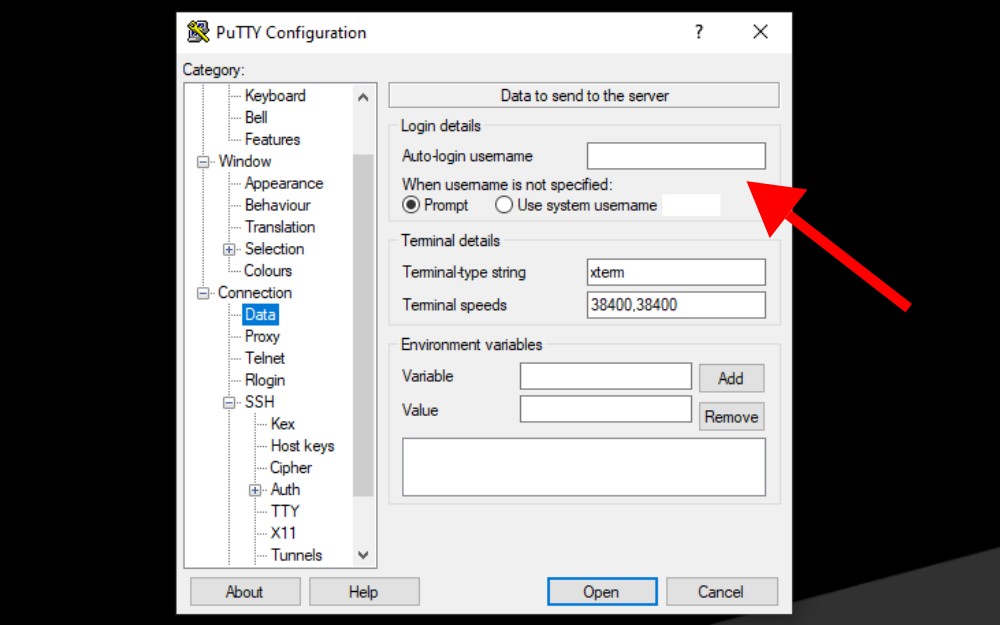
- Go back to “Session” on the left menu and type a name for the connection inside “Saved sessions” input box.
- Click “Save”.
- Click “Open” to connect to your server.
If you have any suggestion, feel free to contact me via social media or email.
Latest tutorials and articles:
Featured content:

