Installing several operating systems on the same drive
Table of Contents
- Installing a Linux OS with another Linux OS.
- Installing Linux with Windows
- Installing Windows as your first OS: some considerations
In this tutorial I will show you how to have several Linux operating systems (OS) on the same computer.
These instructions are valid for UEFI systems.
When a computer boots in UEFI mode, first looks up for a bootloader in the EFI partition (which is created during installation of the first OS). This bootloader has a list of installed OS, so you can choose one.
Installing a Linux OS with another Linux OS.
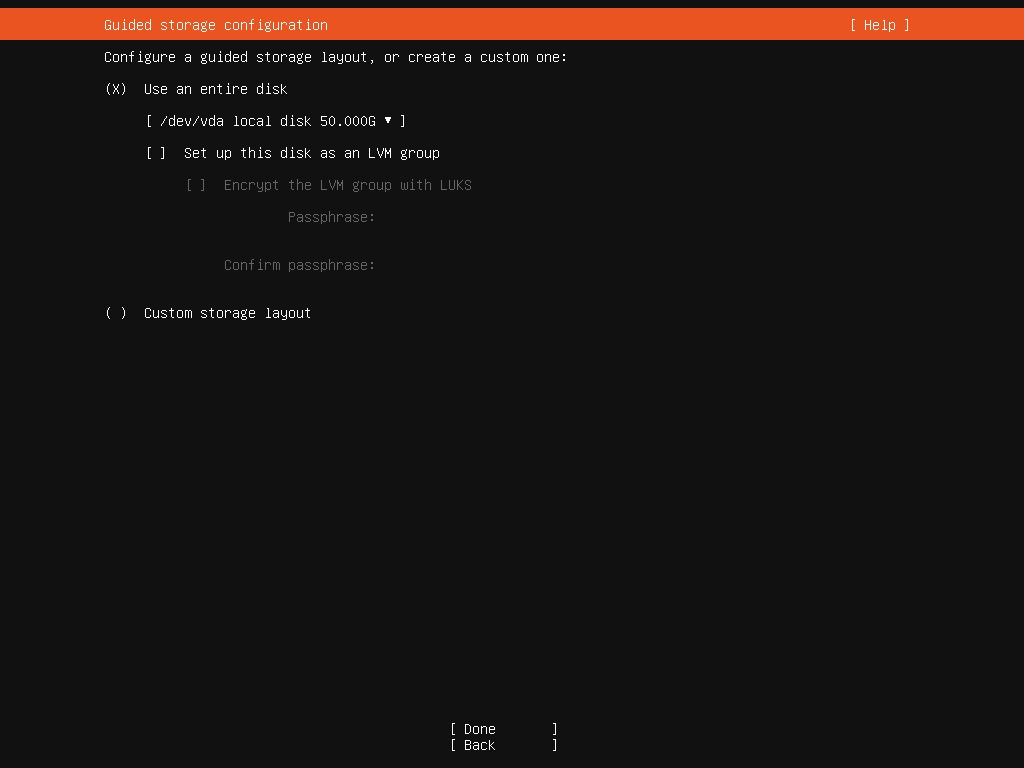
For this tutorial, I’ve installed Ubuntu Server 20.04 as the first system (using default configuration without LVM).
The disk partition schema after installation is:
Disk /dev/vda: 50 GiB, 53687091200 bytes, 104857600 sectors
Units: sectors of 1 * 512 = 512 bytes
Sector size (logical/physical): 512 bytes / 512 bytes
I/O size (minimum/optimal): 512 bytes / 512 bytes
Disklabel type: gpt
Disk identifier: 84F36EAF-34B5-4402-9D0C-287D68BBE538

Device       Start       End   Sectors  Size Type
/dev/vda1     2048   1050623   1048576  512M EFI System
/dev/vda2  1050624 104855551 103804928 49.5G Linux filesystem
Resizing file system and partition
For this step we will need a live USB system, because we need to unmount the Linux filesystem partition. As I’m going to install Linux Mint, I will use it. Make sure your system will boot from the USB.
It’s recommended that you back up the data inside partition you want to resize. Then, using Live system, unmount partition if it’s mounted.
It’s possible that you don’t need to use “sudo” on your Live system if you are a root user on it.
- Check filesystem.
# Replace with your system partition path
sudo e2fsck -f /dev/vda2- Resize filesystem.
# Replace partition path and new size
sudo resize2fs /dev/vda2 15G- Open
fdisk.
# Replace with your hard disk path
sudo fdisk /dev/vda- Delete system partition.
# Make sure which partition you want to delete, you can type "p" to see a partition list
Command (m for help): d
Partition number (1,2, default 2): 2
-
Partition 2 has been deleted- Recreate the partition with the new size.
# Replace with your partition number and new size
Command (m for help): n
Partition number (1,2 default 2): 2
First sector (1050624-104857566, default 1050624):
Last sector, +/-sectors or +/-size{K,M,G,T,P} (1050624-104857566, default 104857566): +15G
-
Created a new partition 2 of type 'Linux filesystem' and of size 15GiB.
Partition #2 contains a ext4 signature
-
Do you want to remove this signature? [Y]es/[N]o: N- Create a new partition
Command (m for help): n
# Accept the defaults- Save changes
Command (m for help): w- Format the new partition
# Replace with your new partition path
sudo mkfs.ext4 /dev/vda3- Reboot from your hard disk and make sure everything works.
Installing the new system
I’m going to install Linux Mint 20.2 as the second OS. In this case, where “Installation type” window appears, check “Something else” and then “Continue”. This window appears:
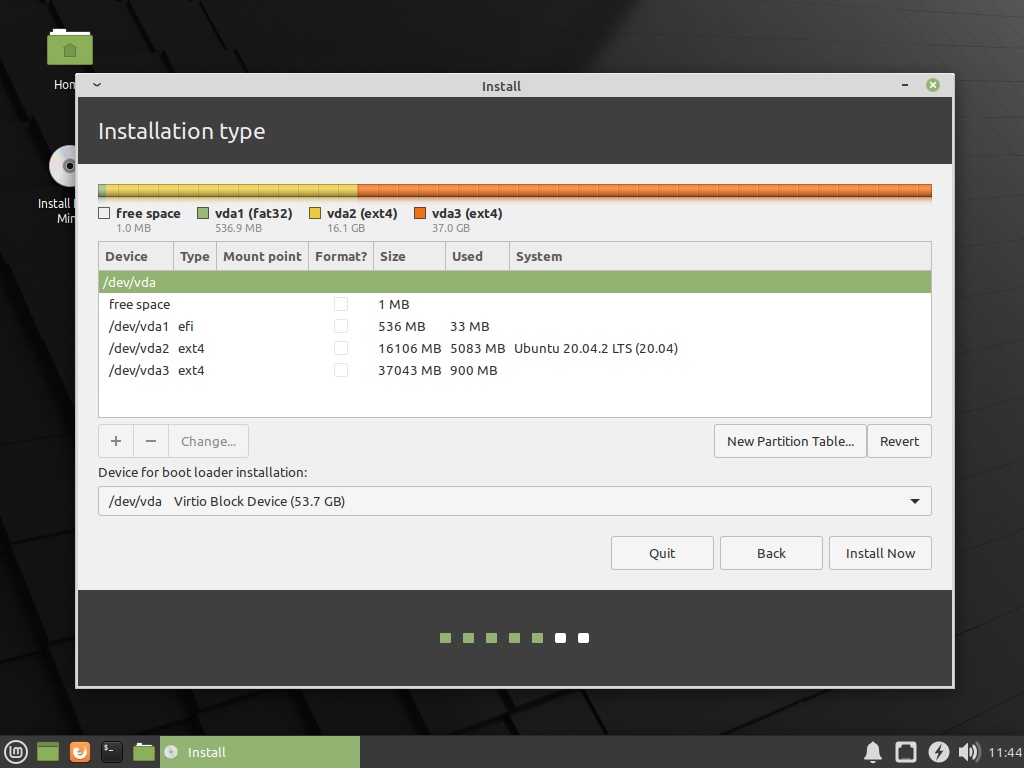
Click on the new partition and select “Change”. Select “Ext4 journaling system” under “Use as:” and type ”/” under “Mount point:”. You can check “Format partition”.
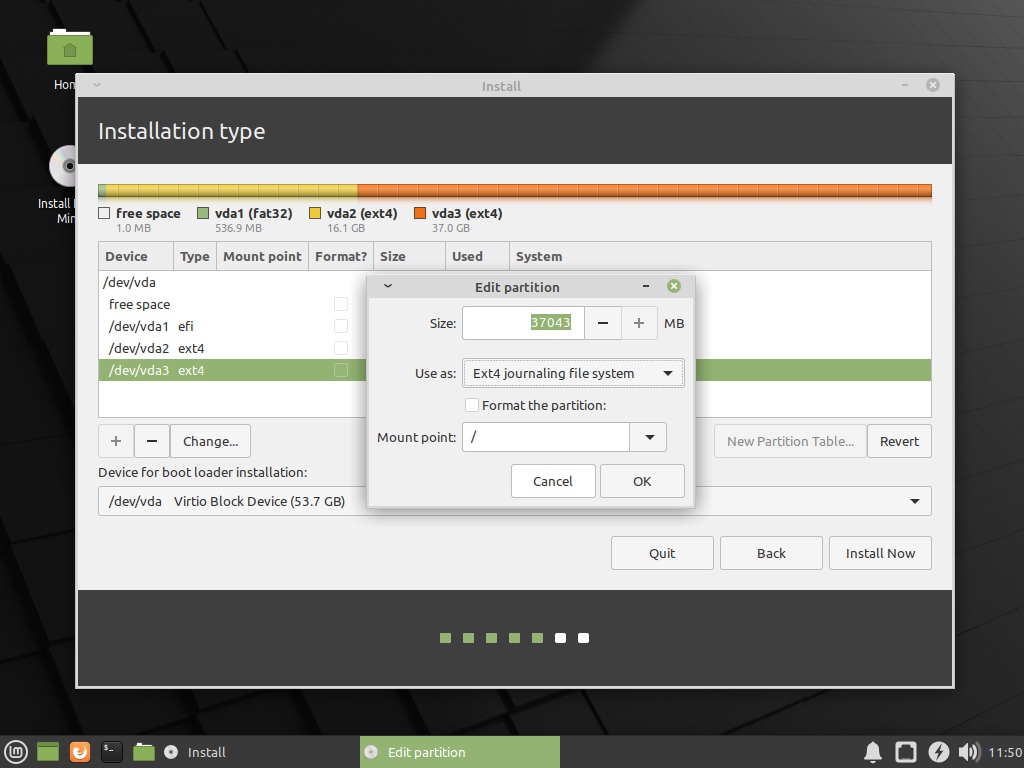
In “Device for boot loader installation”, select your EFI partition.
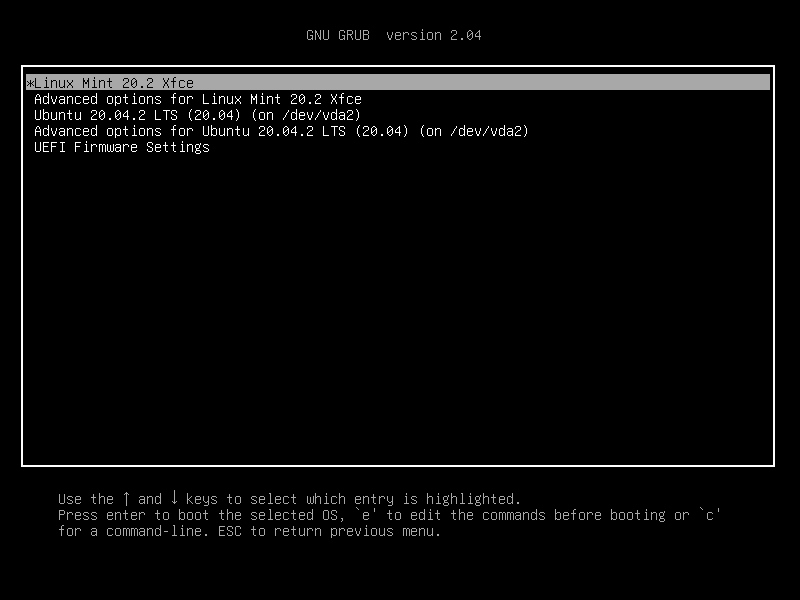
Once installed, reboot your computer, this window will appear and you will be able to select your OS:
Installing Arch Linux as the third system because, why not?
I’m going to install Arch because its installation process is a bit more complicated.
- Run Arch from a USB.
- Follow Arch Linux Installation Guide.
- The resizing section is the same as in Mint (without using “sudo”).
- Mount your new partition on
/mnt.
# Replace with your new partition path
mount /dev/vda4 /mnt- Mount your EFI partition on
/mnt/boot.
# Replace with your EFI partition path
mkdir /mnt/boot
mount /dev/vda1 /mnt/boot- When you reach Bootloader section, follow these steps.
- Install these packages.
pacman -S grub efibootmgr os-prober- Install GRUB.
grub-install --target=x86_64-efi --efi-directory=/boot --bootloader-id=GRUB- Mount system partitions of other OS.
mkdir /mnt/ubuntu
mkdir /mnt/mint
mount /dev/vda2 /mnt/ubuntu
mount /dev/vda3 /mnt/mint- Edit
/etc/default/gruband add/uncomment this line:
GRUB_DISABLE_OS_PROBER=false- Create the main configuration file.
grub-mkconfig -o /boot/grub/grub.cfg- Command output will show a list with all OS installed.
- On Arch, you may need to install
networkmanagerin order to have Internet access after installation.
pacman -S networkmanager# After reboot
systemctl enable NetworkManager
systemctl start NetworkManagerInstalling Linux with Windows
In this section, we are going to install a Linux OS on a Windows computer. I’m going to install Manjaro XFCE 21.1.2 on a Windows 10 computer.
It’s recommended that you disable Fast Startup and Hibernation on Windows (Control Panel -> Power Options -> Choose what the power buttons do -> Change settings that are currently unavailable, then under “Shutdown Settings” uncheck “Turn on Fast Startup” and “Hibernate”, and click “Save Changes”).
Resizing partition
- On Windows, open “Disk Management”.
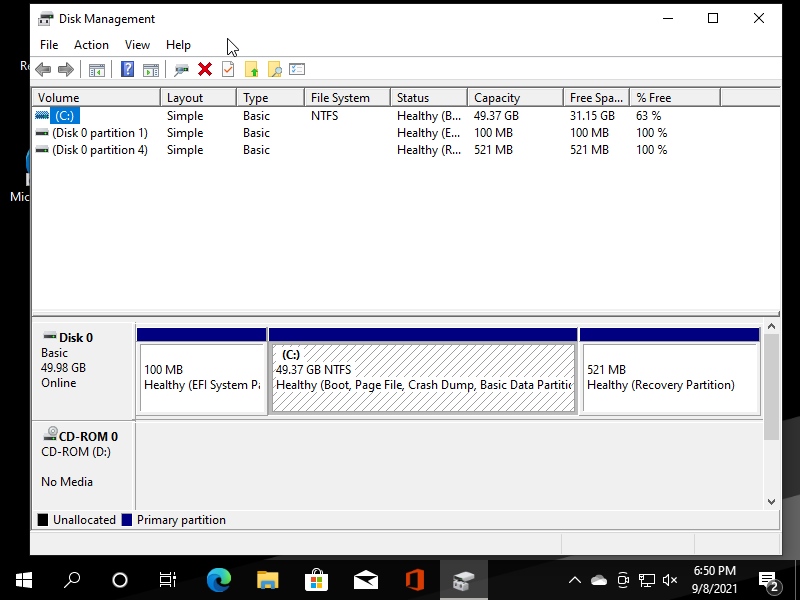
- Select data partition (C:, NTFS-formatted), right-click and select “Shrink Volume…”.
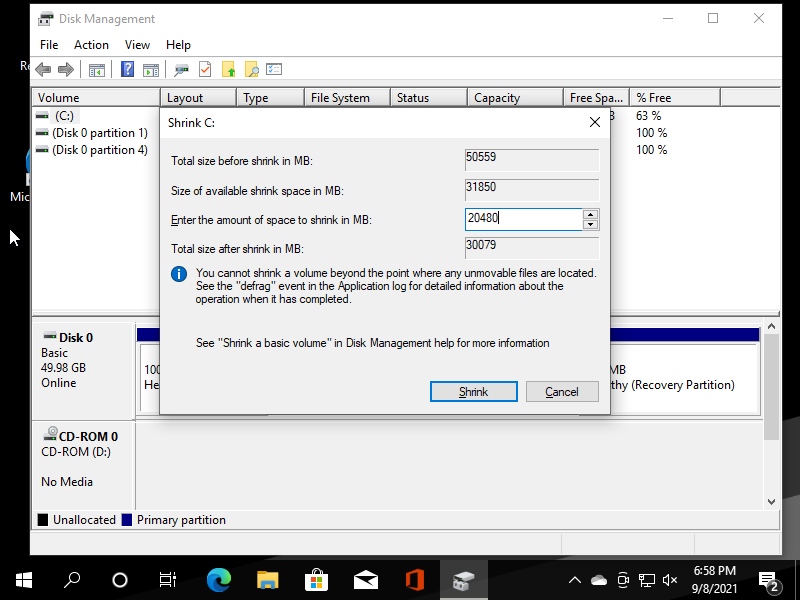
- In “Enter the amount of space to shrink in MB”, type amount of MB to shrink, and click “Shrink”.
- Click on Unallocated space, right-click and select “New simple volume”.
- Press “Next” until “Assign Drive Letter or Path” window appears. Select “Do not assign a drive letter or drive path”. Click “Next”.
- Check “Do not format this volume” and click “Next”. Click “Finish”.
If you cannot shrink the volume more than you want, try this:
- Disable system restore (Settings -> System -> About -> System info -> Advanced system settings).
- Defragment windows partition (Settings -> search “Defragment and Optimize Drives”).
Installing new system
- Now you can boot your Linux ISO image.
- Start installation process.
- When “Partitions” window appears, select “Manual partitioning”.
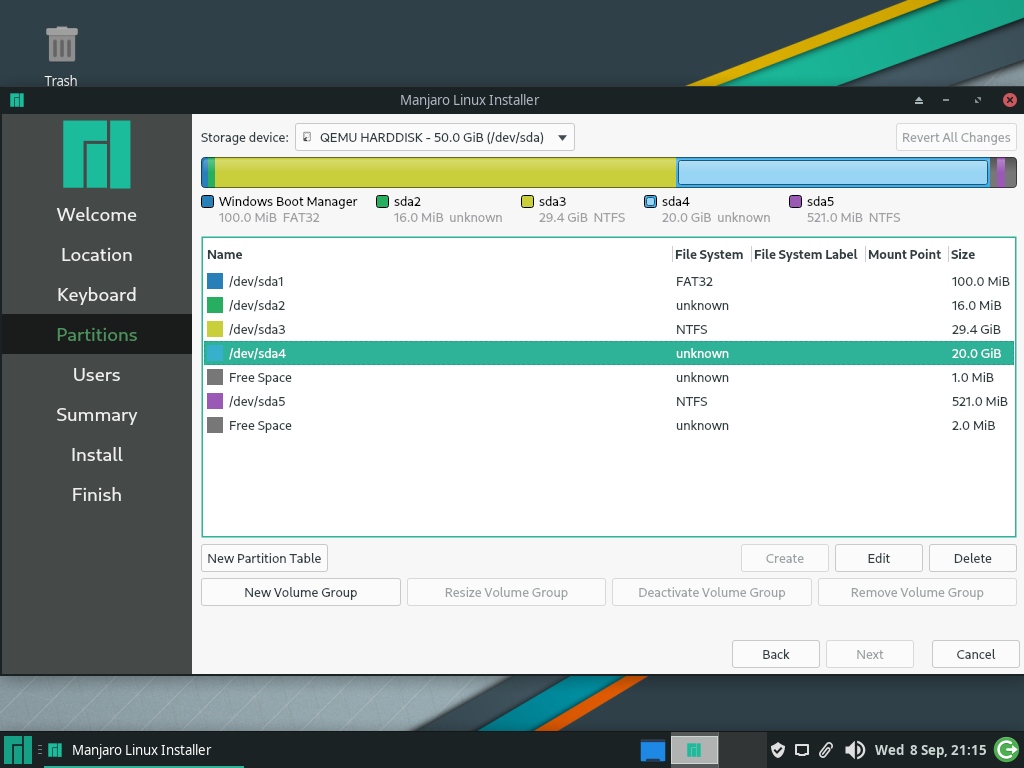
- Select the new partition and click “Edit”.
- Select “Format” and select “ext4” under “File System”.
- Select ”/” under “Mount Point”, click “OK”.
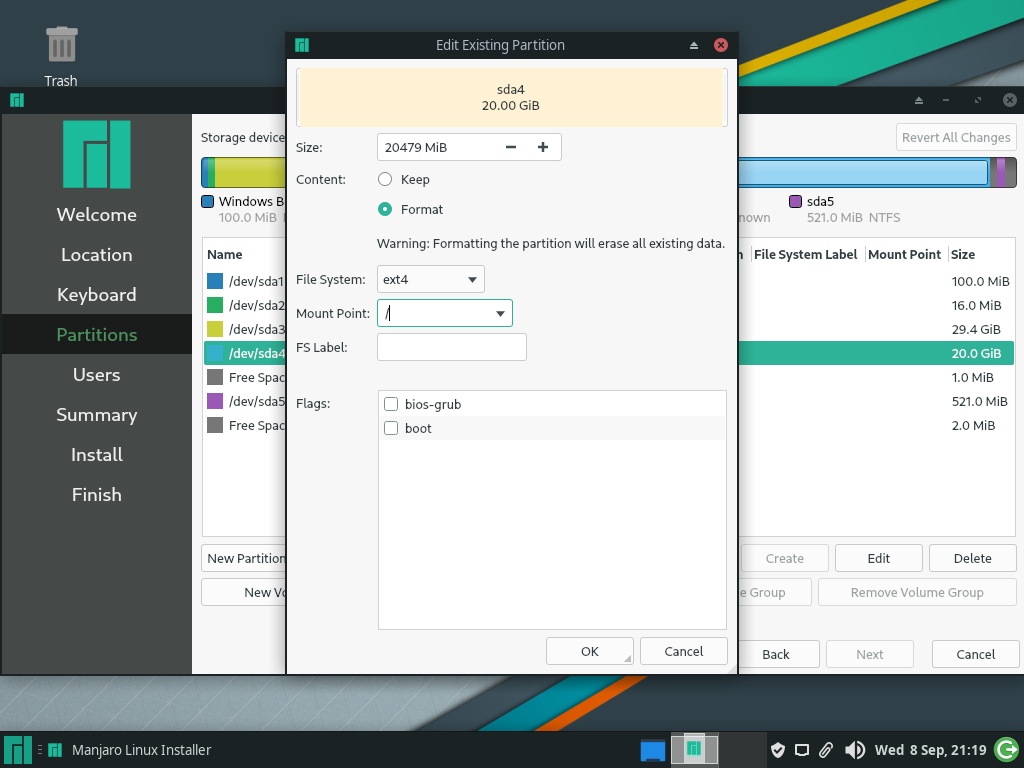
- Select your EFI partition (FAT32 formatted) and click “Edit”.
- Check “/boot/efi” under “Mount Point”. Check that “boot” flag is selected and “Keep” is selected in “Content”. Click “OK”.
- Click “Next”.
- If a “No EFI system partition configured” window appears, ignore it.
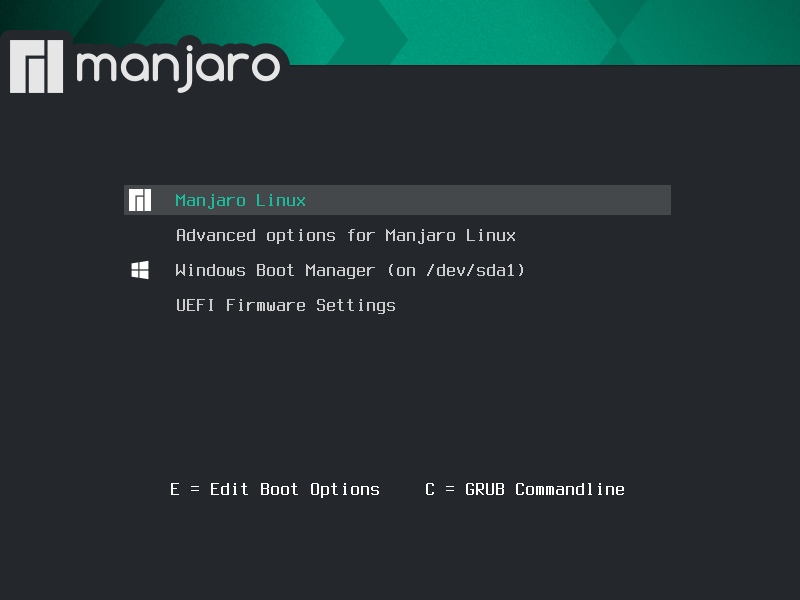
- After installation, reboot and this window will appear where you can select your OS:
Optional: create a shared partition
You can create a partition to share files between Windows and your Linux OS. Windows does not detect filesystems created with Linux, and using the Windows partition on Linux could become your Windows system unusable if you change file permissions or remove system files by mistake.
We are going to format the new partition as NTFS. In order to mount NTFS partitions on Linux, you may need to install ntfs-3g package.
- You can create the partition with Linux (using
fdisk,gparted, etc.) but you need to create the NTFS filesystem with Windows (using their Disk Manager utility). - Created a folder in Linux to mount the partition (e.g.:
/mnt/shared-partition). - Add the partition to
/etc/fstabto mount it at boot time.
# An example of /etc/fstab line
UUID=4ECCA1C4CCA1A725 /mnt/shared-partition ntfs rw,nouser,auto,noexec 0 0- You can view filesystem UUID by running
lsblk -o name,uuid. - You can change mount properties to suit your needs.
I recommend you to create a folder inside your new filesystem and add files there (e.g.: /mnt/shared-partition/files) because The filesystem root will have some Windows folders that it’s better to not touch.
Installing Windows as your first OS: some considerations
If you are going to install Windows on a blank drive, its installation medium will create three partitions: EFI, MSR and “Primary” (where Windows will be installed). EFI partition will have only 100MB, and if you are planning to install more OS, this partition will fill up quickly.
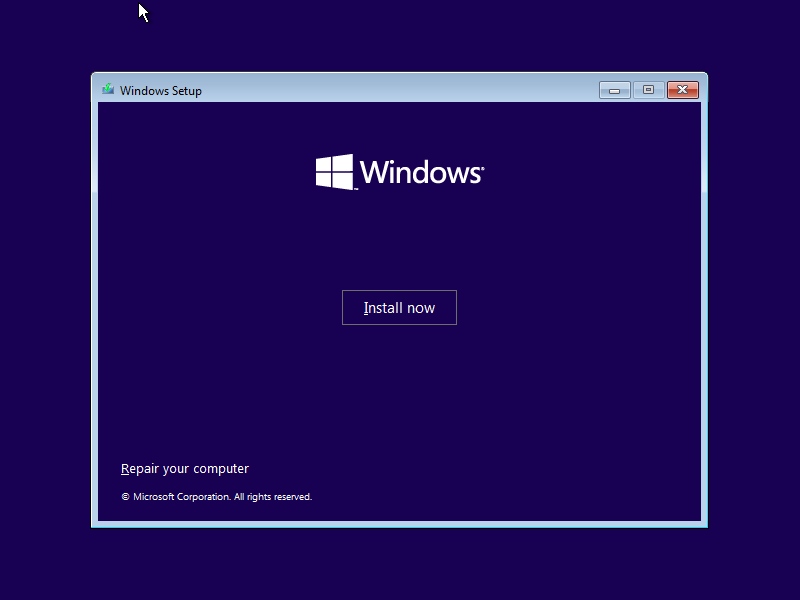
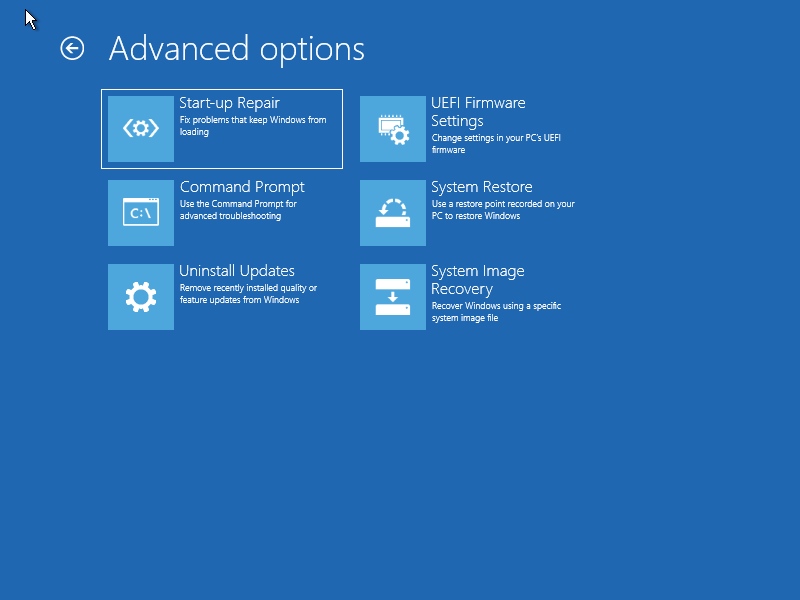
- To increase EFI partition size, you need to click “Repair system” after selecting your language in the Windows Setup. Then, press “Trubleshoot” and “Command Prompt”.
- Inside the command prompt, type
diskpartand press Enter. - Type
list diskto see all disks attached.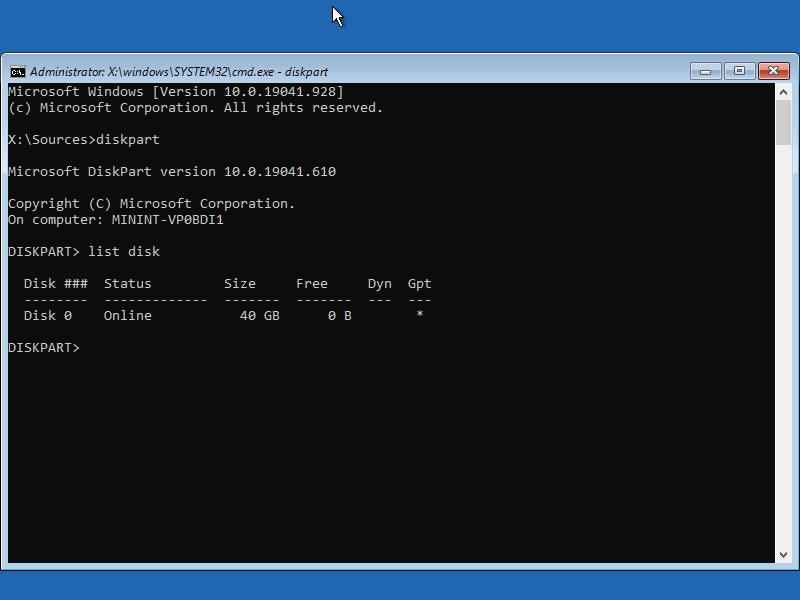
- Select the disk with
select diskand its number (0, 1,…).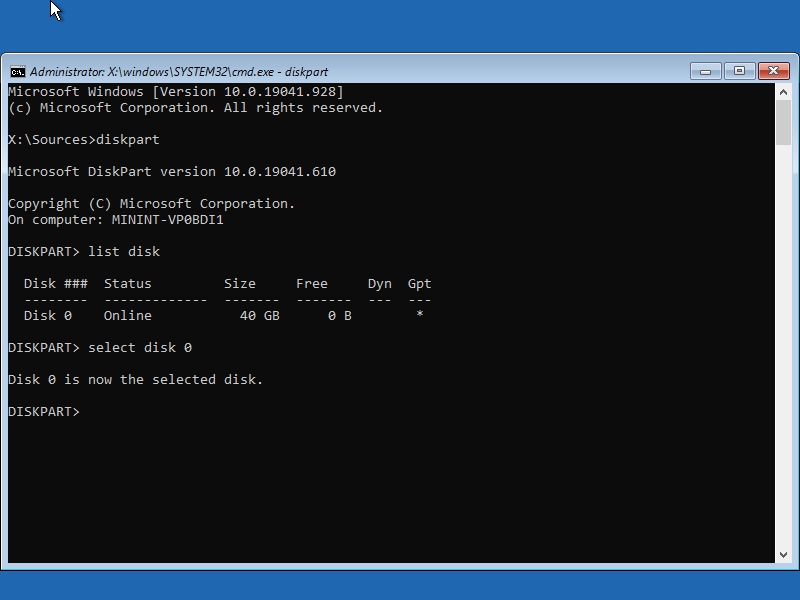
- You can type
list partitionto see if there are partitions on the disk. If you want to delete them, typeselect partitionand the partition number and then typedelete partition(typedelete partition overrideif you can’t delete a partition). - Type
convert gptto create a GPT disk, if it has MBR partition style. - To create new partition, we are going to start with EFI. Type
create partition efi size=and the partition size (in MB). My minimum recommended size is 200MB but 500MB is a good choice.
create partition efi size=500- Create MSR (Microsoft Reserved) by typing:
create partition msr size=16(16MB is the standard size for this partition). - Type
create partition primaryto create the Windows partition. If you don’t add thesizeparameter, it will use all the remained space. To add a Recovery partition, you need to add thesizeparameter with a size that leaves at least 500MB for the Recovery partition. - Add a Recovery partition after Windows partition. Type
create partition primary. Then, typeset id de94bba4-06d1-4d40-a16a-bfd50179d6acto set the partition as a Recovery partition.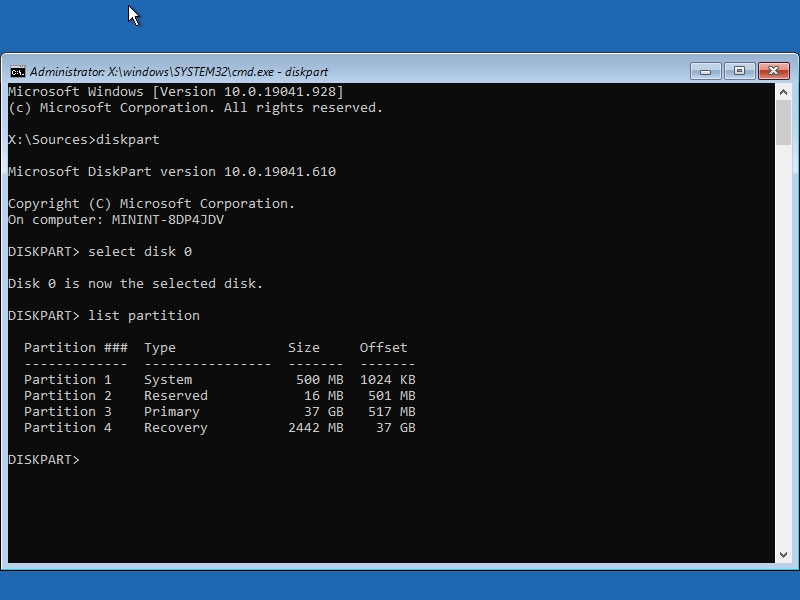
- Finally, type
exitto close “diskpart” andexitagain to close the command prompt. Then, select “Shutdown PC” and boot you computer from the installation medium again to start the installation process. It will show you the four partitions.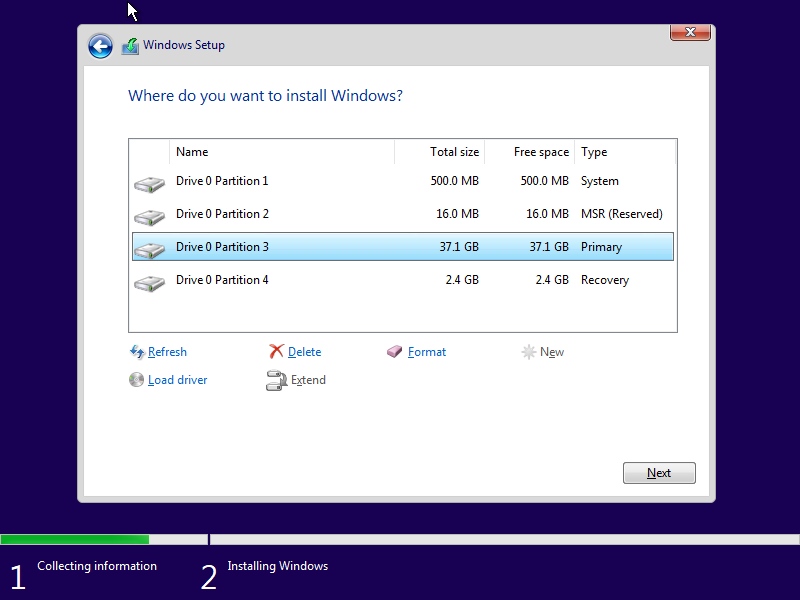
If you have any suggestion, feel free to contact me via social media or email.
Latest tutorials and articles:
Featured content:

