Kernel upgrade / downgrade
Table of Contents
The kernel is the core of an operating system. Connects the application software to the hardware of a device. New kernels offer better hardware compatibility but can also cause problems with older hardware. In this tutorial you will learn how to upgrade or downgrade your system’s kernel.
Upgrade the kernel
- First, check if your system’s repositories have a newer kernel version by using the package manager to update installed packages (
apt update && apt upgrade,pacman -Syu,yum update, etc.). - If not, you can search for your operating system’s kernel page, and look for the kernel version you want to install.
- Ubuntu: https://kernel.ubuntu.com/~kernel-ppa/mainline/
- Debian: https://packages.debian.org/source/testing/linux
- Download and install the package like any other package (using
dpkg,pacman,yum, etc). - Reboot.
Do not remove the older kernel, you may need to downgrade if something goes wrong.
Downgrade the kernel
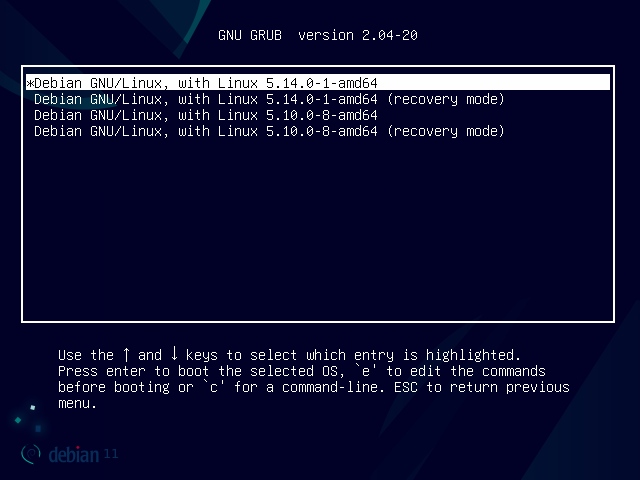
- Your operating system probably save older kernels (unless you manually delete them), so you only need to reboot your device and, in the bootloader menu, select “advanced options” (or something similar), and it will show you a list of installed kernels. You can select the kernel version you want to use.

- To make the change permanent, update
/etc/default/gruband change these lines:
GRUB_DEFAULT=saved
GRUB_SAVEDEFAULT=true- This will save your choice at the next boot.
- Run
sudo update-grub(Debian/Ubuntu).
- You can also remove the newer kernel.
Arch Linux
“Advanced options” Arch boot menu doesn’t show a kernel list, so in order to downgrade, you need to install the older kernel by using pacman. Pacman saves older packages inside /var/cache/pacman/pkg/. Downgrade linux (downgrade linux-headers and any kernel modules if needed):
sudo pacman -U /var/cache/pacman/pkg/linux-5.13.13.arch1-1-x86_64.pkg.tar.zstIf you have any suggestion, feel free to contact me via social media or email.
Latest tutorials and articles:
Featured content:


