Apache: how to create a web server
Table of Contents
- Install and start Apache
- Configuration files paths
- Add website files
- Create a Virtual Host
- Enable the new website
- apachectl
- Add PHP
- Proxy
- Rewrite rules
- Enable SSL/TLS
- SSL reverse proxy
- Restrict access to a directory with a password
- Cache
- Logs
- More VirtualHost options
- Containers
- Documentation
Apache is the most used HTTP server and in this tutorial you will learn all the basics about this program.
Install and start Apache
Apache package has different names depending on the Linux distribution.
- Debian/Ubuntu/Alpine:
apache2. - Arch Linux:
apache. - CentOS/Fedora/Amazon Linux:
httpd.
Once installed, check if the service that manages Apache is running and if it will start when the system boots up. If your operating system uses systemd as its init process, type:
systemctl status <package name>
# e.g.: systemctl status apache2
Check the Loaded and Active lines. In the first line, check if, after the service file path, it says enabled. If not, run (as root or with sudo):
systemctl enable <package name>If in the second line it says inactive (dead), you’ll need to run (as root or with sudo):
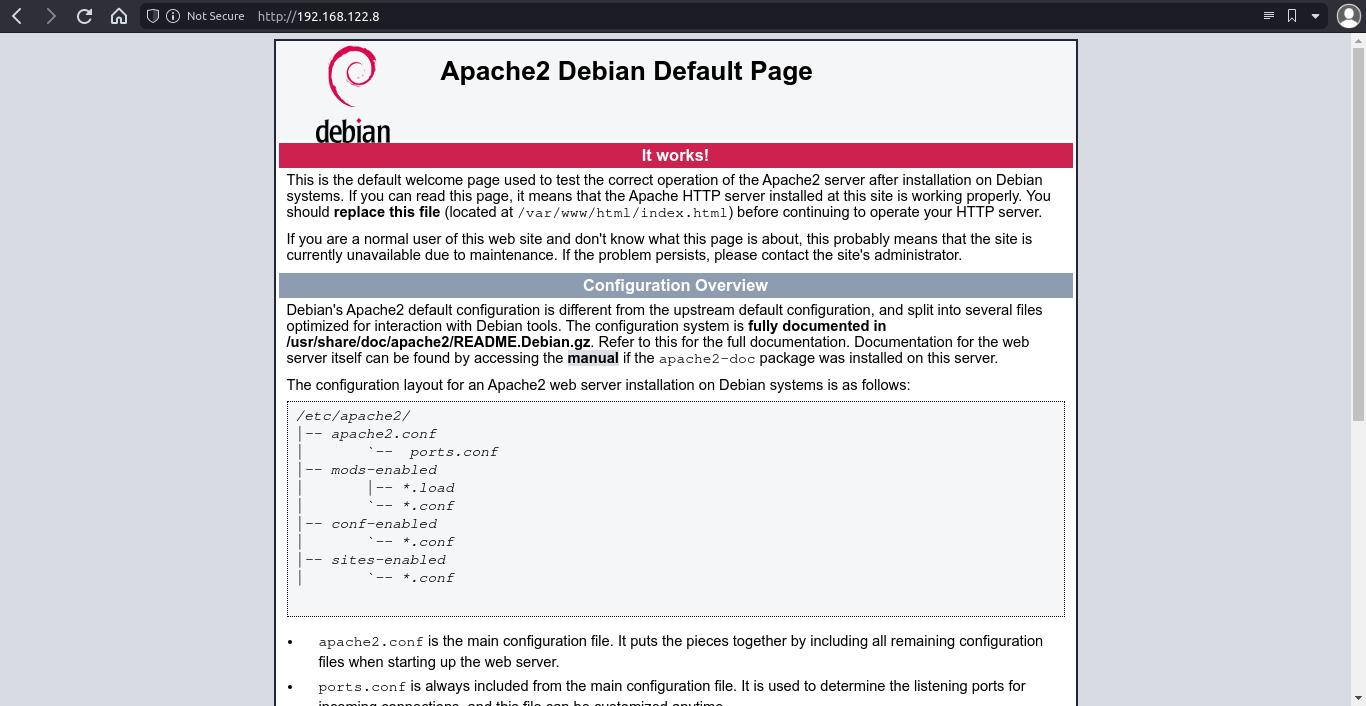
systemctl start <package name>Now, you can go to http://<server ip> and you’ll see the Apache default page.
Configuration files paths
Test page is inside /var/www/html/. You don’t need to use this path for your projects.
Apache uses the concept of “Virtual hosts”. You only need to create one virtual host per website if you don’t want to use SSL/TLS (https://). You need SSL/TLS if you want to encrypt traffic between your web server and the users (in this case, you have to create at least two virtual hosts per website, one for HTTP and other for HTTPS).
Virtual host files paths depend on how the operating system has compiled Apache.
Debian / Ubuntu
You can create virtual hosts by creating config files inside /etc/apache2/sites-available/.
Fedora / CentOS / Amazon Linux
You can create virtual hosts by creating config files inside /etc/httpd/config.d/.
Add website files
Create a new directory under /var/www/ and give it the appropriate permissions, so the Apache user (www-data for Debian/Ubuntu, apache for other OS) can go inside folders and read files. We can achieve this by setting www-data or apache as group owner for files and directories.
# run this as root or use sudo

mkdir /var/www/mywebsite
chown <your username>:www-data /var/www/mywebsite
chmod 2750 /var/www/mywebsite2750permission code means:2for set group id,7for read, write and execute permissions for owner,5for read and execute permissions to group,0for no permissions for other (check Permissions in Linux: chmod, chown and chgrp).
Once you have copied or created the files, ensure they have proper permissions:
find /var/www/mywebsite/ -type f -exec chmod 640 {} \;Create a Virtual Host
Inside /etc/apache2/sites-available/ (for Debian/Ubuntu) or /etc/httpd/conf.d/ (for Fedora and others), create a new .conf file and add these lines (this is the basic content for a virtual host to work).
# /etc/apache2/sites-available/mywebsite.conf
<VirtualHost *:80>
  DocumentRoot /var/www/mywebsite
</VirtualHost>DocumentRootspecifies where website files are located.- You may need to include the following text inside the VirtualHost if you get a 403 error (because of the default configuration of
httpd.conf). Replace/var/wwwwith your website files path:
<Directory /var/www>
  Require all granted
</Directory>sites-availableandsites-enabledare deprecated. Recent apache installations use configuration files inside Apacheconforconf.dfolder.
Enable the new website
Debian / Ubuntu
First, disable the default website:
a2dissite 000-default.conf(run as root or with ‘sudo’).
You have two methods for enabling the website (run the commands as root or using sudo):
a2ensite mywebsite.ln -s /etc/apache2/sites-available/mywebsite.conf /etc/apache2/sites-enabled/mywebsite.conf.
Then, restart or reload Apache (as root or with sudo):
systemctl restart apache2
# or
systemctl reload apache2
Fedora / CentOS / Amazon Linux
You don’t need to “enable” the website, just restart or reload Apache.
apachectl
apachectl is an Apache control interface you can use to start, stop, restart and check that a config file syntax is valid.
# run as root or with sudo
apachectl <command>
Available commands are:
startstoprestartgraceful: restarts Apache without closing open connections.statusconfigtestor-t: checks the syntax of the configuration files.
Add PHP
In order to be able to use PHP, you need to install PHP and the Apache module for PHP. Check package names (and versions) for these packages on your system.
# Debian 11
apt install php7.4 libapache2-mod-php7.4
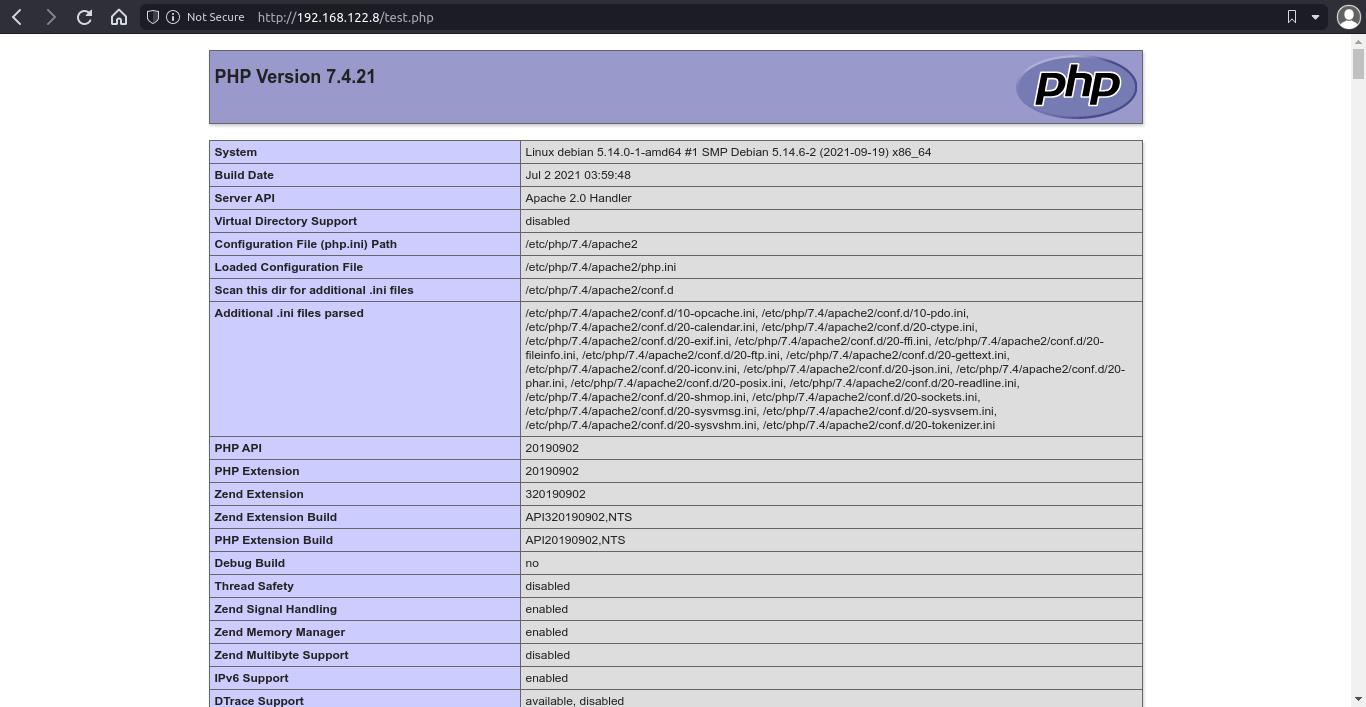
Reload Apache, and add a .php file with some PHP code for testing (like /var/www/mywebsite/test.php with <?php phpinfo(); ?>)
Proxy
Enable proxy_http module (remember to use ‘sudo’ or run as root).
a2enmod proxy_httpModify your VirtualHost (change port number if needed).
ProxyPass / http://127.0.0.1:8000/
ProxyPassReverse / http://127.0.0.1:8000/
Rewrite rules
Enable rewrite module.
a2enmod rewriteInside a VirtualHost or a Directory block:
RewriteEngine On
RewriteBase /
RewriteRule <pattern> <replace>
<Directory /var/www/website>
RewriteEngine On
RewriteBase /
RewriteRule ^([a-z])=([a-z0-9]+)/?$ index.php?$1=$2 [NC]
</Directory>[NC]is a flag that means “case insensitive pattern”.
Enable SSL/TLS
You can encrypt the traffic between your web server and users with SSL/TLS (it’s something highly recommended if your website has some kind of authentication system, but even if it hasn’t, enable SSL is a good choice).
Before doing anything, you need a domain and that domain to redirect to your server public IP.
Enable “SSL” and “Rewrite” Apache modules (run as root or with sudo).
a2enmod ssl
a2enmod rewrite
Add a Let’s Encrypt key and certificate (this is needed for encrypt the traffic, you can use certificates from other companies, but LE certificates are free and easy to install).
- First, install Let’s Encrypt tool, “certbot”. Certbot website has installation info for most operating systems and web servers, but in most Linux distros there is a package called
python3-certbot-apachethat contains certbot. - Create a new SSL certificate and key:
# run as root or with sudo
certbot certonly --apache- Follow the steps (select or type your domain and email). Certbot will check that the domain redirects to your server. If everything goes as expected, there will be a certificate file in
/etc/letsencrypt/live/<your domain>/fullchain.pemand a key file in/etc/letsencrypt/live/<your domain>/privkey.pem(these paths may be a bit different, check before continuing).
Add a new virtual host for SSL. You don’t need to create another file, you can edit your original virtual host file.
<VirtualHost *:80>
  ServerName mywebsite.com
  DocumentRoot /var/www/mywebsite
</VirtualHost>

<VirtualHost *:443>
  ServerName mywebsite.com
  DocumentRoot /var/www/mywebsite
  SSLEngine on
  SSLCertificateFile /etc/letsencrypt/live/mywebsite.com/fullchain.pem
  SSLCertificateKeyFile /etc/letsencrypt/live/mywebsite.com/privkey.pem
</VirtualHost>
In order to redirect HTTP requests to HTTPS, modify your virtual hosts like this:
<VirtualHost *:80>
  ServerName mywebsite.com
  RewriteEngine on
  RewriteRule ^ https://%{HTTP_HOST}%{REQUEST_URI} [NE,R=301]
</VirtualHost>

<VirtualHost *:443>
  ServerName mywebsite.com
  DocumentRoot /var/www/mywebsite
  SSLEngine on
  SSLCertificateFile /etc/letsencrypt/live/mywebsite.com/fullchain.pem
  SSLCertificateKeyFile /etc/letsencrypt/live/mywebsite.com/privkey.pem
  SSLProtocol +TLSv1.2 +TLSv1.3
  SSLCipherSuite HIGH:!aNULL:!MD5
</VirtualHost>
Restart Apache and you’re done.
NOTE: You can create self-signed certificates for testing purposes. In this case you don’t need to have a domain, you just run this command to create a key and a certificate (you need to have openssl installed):
openssl req -x509 -nodes -newkey rsa:4096 -keyout key.pem -out cert.pem -days 365NOTE: If you use Cloudflare, you don’t need to add a VirtualHost for SSL (traffic is encrypted between Cloudflare and end users, but not between Cloudflare and your server). If you need encrypted traffic between your server and Cloudflare, add an SSL VirtualHost and check Cloudflare docs.
SSL reverse proxy
Check Reverse proxy with SSL.
Restrict access to a directory with a password
First, create the password file with htpasswd.
htpasswd -c /path/to/passfile <username>Then, update the VirtualHost by adding a ‘Location’ block inside.
  <Location "/">
    AuthType Basic
    AuthName "Protected folder"
    AuthUserFile /path/to/passfile
    Require valid-user
</Location>- Location path is relative to ‘DocumentRoot’.
Finally, reload apache.
Cache
Enable ‘expires’ module:
a2enmod expiresEdit your VirtualHost:
  ExpiresActive on
  ExpiresDefault "access plus 1 month"
  ExpiresByType image/x-icon "access plus 1 year"
  ExpiresByType application/javascript "access plus 1 month"
  ExpiresByType image/jpg "access plus 1 month"
  ExpiresByType image/jpeg "access plus 1 month"
  ExpiresByType image/png "access plus 1 month"
  ExpiresByType text/css "access plus 1 month"
Logs
Inside a VirtualHost:
ErrorLog /usr/local/apache2/error-custom.log
LogFormat "%v %h %l %u %t \"%r\" %>s %b" formatlog
CustomLog /usr/local/apache2/access-custom.log formatlog
More VirtualHost options
ServerName: example.com: specify for which domain or subdomain the server has to respond.ServerAlias: www.example.com: another address for the server (usually the ‘www’ version).Alias /folder1 /var/www/folder2: set aliases.
Directory block
<Directory "/path">: use absolute paths.Options Indexes FollowSymlinks: enable an index page (content listing) if there is no index.html file in the folder.Require all granted: grants public access to the folder when parent folder is restricted.AllowOverride None: ignore.htaccessfiles.
Containers
You can run an Apache server using containers:
docker run -d --name apache -p 80:80 httpdConfig files are inside /usr/local/apache2/conf/. Default website root is in /usr/local/apache2/htdocs/.
You can add a new conf file inside conf/extra/ and then activate it by adding this line on conf/httpd.conf:
Include conf/extra/my_conf.confDocumentation
Check Apache Server Documentation
If you have any suggestion, feel free to contact me via social media or email.
Latest tutorials and articles:
Featured content:

