NGINX: the alternative to Apache for web servers
Table of Contents
- Install and start Nginx
- nginx command-line tool
- Configuration files paths
- Add website files
- Create a new website config file
- Enable the new website
- Add PHP
- Proxy
- Enable SSL/TLS
- SSL reverse proxy
- Restrict access to a directory with a password
- Restrict access based on IP
- Cache
- Custom error pages
- Limit connections
- Limit rate
- Limit bandwith
- Logs
- Compression
- More options for config file
- Documentation
You can use NGINX to create a web server easily and, if you come from Apache, you can migrate without too much effort.
Install and start Nginx
You can search for nginx with your package manager and install it. It usually starts automatically, but you can check if the nginx service is active and if it will start when the system boots up. If your operating system uses systemd as its init process, type:
systemctl status nginxCheck the Loaded and Active lines. In the first line, check if, after the service file path, it says enabled. If not, run (as root or with sudo):
systemctl enable nginxIf in the second line it says inactive (dead), you’ll need to run (as root or with sudo):
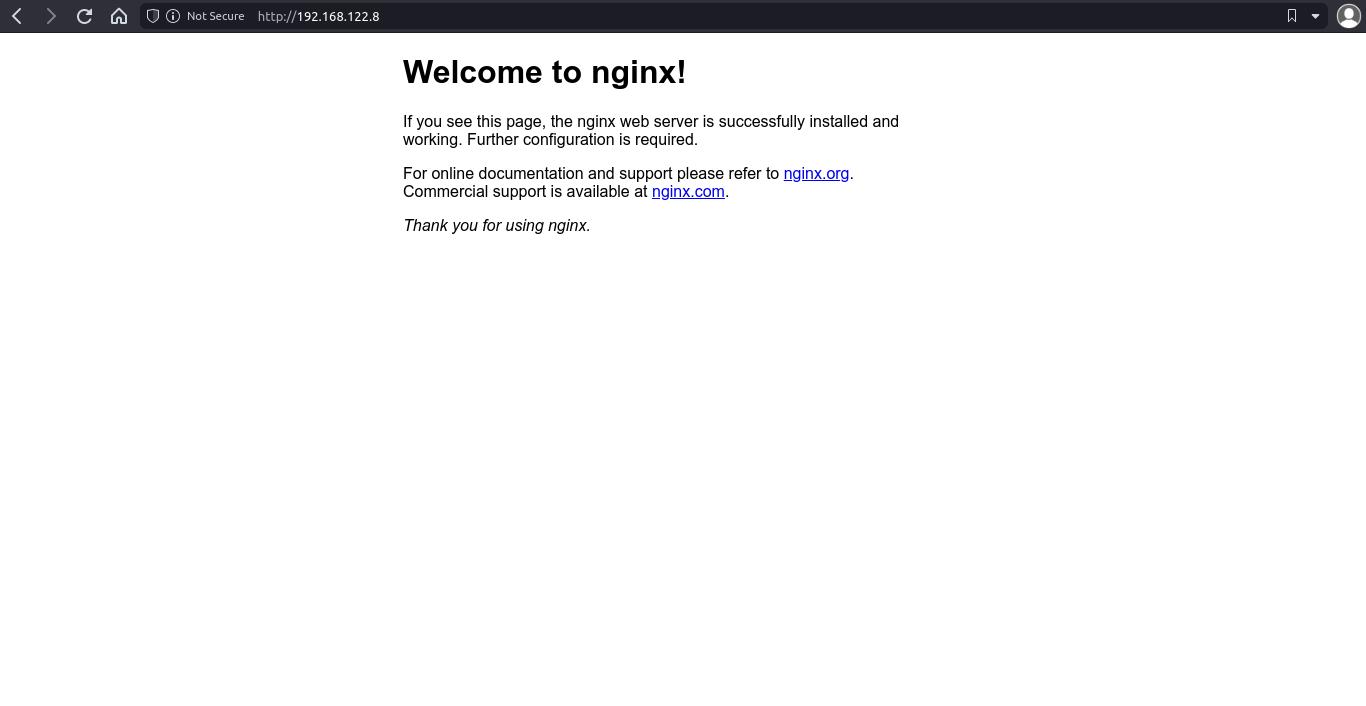
systemctl start nginxNow, you can go to http://<server ip> and you’ll see the Nginx default page.
nginx command-line tool
NGINX includes a command-line tool called nginx you can use to stop or reload nginx or to check config files syntax (use it as a root user or with sudo).
nginx: start.nginx -s stop|quit|reopen|reloadnginx -t: check config files syntax.
Configuration files paths
Test page is usually inside /var/www/html/, but it can also be under /usr/share/nginx/html/ (check what the test page says about that). You don’t need to use these paths for your website.
Websites configuration files path depends on the operating system:
Debian / Ubuntu
These files are under /etc/nginx/sites-available/.
Fedora / CentOS / Amazon Linux / Containers
You can create the files inside /etc/nginx/conf.d/. All .conf files are included in the http context inside /etc/nginx/nginx.conf.
Add website files
Create a new directory under /var/www/ and give the appropriate permissions for the nginx user (www-data in Debian/Ubuntu, nginx in other OS).
# run this as root or use sudo

mkdir /var/www/mywebsite
chown <your username>:www-data /var/www/mywebsite
chmod 2750 /var/www/mywebsite2750permission code means:2for set group id,7for read, write and execute permissions for owner,5for read and execute permissions to group,0for no permissions for other (check Permissions in Linux: chmod, chown and chgrp).
Once you have copied or created the files, ensure they have proper permissions:
find /var/www/mywebsite/ -type f -exec chmod 640 {} \;Create a new website config file
Inside /etc/nginx/sites-available/ (for Debian/Ubuntu) or /etc/nginx/conf.d/ (for Fedora and others), create a new file and add these lines (this is the basic content for a website config file).
# /etc/nginx/sites-available/mywebsite
# or /etc/nginx/conf.d/mywebsite.conf
server {
  listen 80;
  root /var/www/mywebsite;
}rootspecifies where website files are located.
Enable the new website
Debian / Ubuntu
Create a symbolic link between sites-available and sites-enabled:
# run as root or with sudo
ln -s /etc/nginx/sites-available/mywebsite /etc/nginx/sites-enabled/mywebsite
Restart or reload nginx (as root or with sudo):
systemctl restart nginx
# or
systemctl reload nginx
You can also use nginx tool:
nginx -s reloadFedora / CentOS / Amazon Linux
You don’t need to “enable” the website, just restart or reload nginx.
Add PHP
In order to be able to use PHP, you need to install PHP and PHP FastCGI Process Manager (php-fpm) on your system. Check package names (and versions) for these packages on your system.
# Debian 11
apt install php7.4 php-fpm
Enable PHP on your website by editing your website config file (change PHP version with the one you have installed before):
server {
  listen 80;
  root /var/www/mywebsite/;
  index index.html index.php;
  location ~ .php$ {
    include snippets/fastcgi-php.conf;
    fastcgi_pass unix:/var/run/php/php7.4-fpm.sock;
  }
}
Finally, reload nginx service and add a .php file with some PHP code for testing (like <?php phpinfo(); ?>).
Proxy
Add this inside your server block (change port number if needed):
location / {
     proxy_pass http://127.0.0.1:8000;
 }
Enable SSL/TLS
You can encrypt the traffic between your web server and users with SSL/TLS (it’s something highly recommended if your website has some kind of authentication system, but even if it hasn’t, enable SSL is a good choice).
Before doing anything, you need a domain and that domain to redirect to your server public IP (unless you’re using self-signed certificates for testing purposes).
Add a Let’s Encrypt key and certificate (this is needed for encrypt the traffic, you can use certificates from other companies, but LE certificates are free and easy to install).
- First, install Let’s Encrypt tool, “certbot”. Certbot website has installation info for most operating systems and web servers, but in most Linux distros there is a package called
python3-certbot-nginxthat contains certbot. - Create a new SSL certificate and key:
# run as root or with sudo
certbot certonly --nginx- Follow the steps (select or type your domain and email). Certbot will check that the domain redirects to your server. If everything goes as expected, there will be a certificate file in
/etc/letsencrypt/live/<your domain>/fullchain.pemand a key file in/etc/letsencrypt/live/<your domain>/privkey.pem(these paths may be a bit different, check before continuing).
Add a new server block in your website config file.
server {
  listen 443 ssl;
  server_name mywebsite.com;
  root /var/www/mywebsite;
  ssl_certificate /etc/letencrypt/live/mywebsite.com/fullchain.pem;
  ssl_certificate_key /etc/letsencrypt/live/mywebsite.com/privkey.pem;
  ssl_protocols TLSv1.2 TLSv1.3;
  ssl_ciphers HIGH:!aNULL:!MD5;
}- If you have added PHP, add PHP config lines inside this block.
In order to redirect HTTP requests to HTTPS, modify your original server block like this:
server {
  listen 80;
  server_name mywebsite.com;
  return 301 https://$server_name$request_uri;
}- If you are using self-signed certificates, you may need to change
$server_nameto$server_addrbecause you are connecting to the website with the IP and not with a domain.
NOTE: You can create self-signed certificates for testing purposes. In this case you don’t need to have a domain, you just run this command to create a key and a certificate (you need to have openssl installed):
openssl req -x509 -nodes -newkey rsa:4096 -keyout key.pem -out cert.pem -days 365NOTE: If you use Cloudflare, you don’t need to add a SSL server block (traffic is encrypted between Cloudflare and end users, but not between Cloudflare and your server). If you need encrypted traffic between your server and Cloudflare, add an SSL block and check Cloudflare docs.
SSL reverse proxy
Check Reverse proxy with SSL.
Restrict access to a directory with a password
First, create the password file with htpasswd or OpenSSL.
htpasswd -c /path/to/passfile <username>echo -n '<username>:' >> /path/to/passfile
openssl passwd -apr1 >> /path/to/passfileThen, update your server block by adding a ‘location’ block:
location / {
     auth_basic  "Protected folder";
     auth_basic_user_file /path/to/passfile;
 }
Use auth_basic off; to make some section public (using a ‘location’ block).
Restrict access based on IP
You can add these rules on the http, server and location contexts.
location / {
    allow 1.2.3.4;
    deny all;
}
location / {
deny 1.2.3.4;
allow all;
}Cache
location ~* .(jpg|jpeg|png|gif|ico|css|js)$ {
    expires 30d;
}
Custom error pages
Inside your server block:
error_page 404 /error.html;Add a redirect when a path is not found:
location /some/path.html {
  error_page 404 =301 http://example.com/new/path.html;
}
Limit connections
http {
  limit_conn_zone $binary_remote_addr zone=limitbyaddr:10m;
  limit_conn_status 429;
  ...
    server {
      ...
      limit_conn limitbyaddr 20;
      ...
    }
}
Limit rate
http {
  limit_req_zone $binary_remote_addr zone=limitbyaddrreq:10m rate=1r/s;
  limit_req_status 429;
  ...
  server {
  ...
  limit_req zone=limitbyaddrreq burst=5 nodelay;
  ...
  }
}
Limit bandwith
location / {
  limit_rate_after 10m;
  limit_rate 1m;
}
Logs
- Error logs: Inside server block:
error_log /var/log/custom-error.log;- Access logs: Inside http block:
log_format formatlog '[$time_local] $remote_addr $request_method $uri ($status)';Inside server block:
access_log /var/log/custom-access.log formatlog;access_log off: disable access logs.
Compression
Enable compression with gzip on;. By default NGINX only compresses html files, to compress other file types, add:
gzip_types <mime types>;- Add MIME types (
text/plain,application/xml, etc.) separated by spaces.
You can also specify the minimum length of the response to compress with gzip_min_length <bytes>.
If a client does not support compressed responses, you can use gunzip on; to enable decompression on the server.
More options for config file
autoindex on;: enable an ‘index’ page (list contents).add_header Access-Control-Allow-Origin '*';: enable CORS (it’s recommended to restrict CORS to specific domains).
Documentation
Check nginx documentation
If you have any suggestion, feel free to contact me via social media or email.
Latest tutorials and articles:
Featured content:

