asciinema: record and share your terminal sessions
Table of Contents
With asciinema you can record your terminal prompt easily using a purely text-based approach, and share it with anyone.
asciinema does not create video files, but plain-text files (called asciicasts) that a specialized web player, the asciicast player, can play. You can upload asciicasts to https://asciinema.org/ or to your own hosting service.
Installation
Check https://asciinema.org/docs/installation. You can install asciinema in many different ways (pip, pacman, apt and other package managers).
# Using Python pip
sudo pip3 install asciinema
# Debian
sudo apt-get install asciinemaUsage
Recording
Run asciinema rec <filename>. Asciicasts have the .cast suffix (but are plain-text files).
$ asciinema rec test2.cast
asciinema: recording asciicast to test2.cast
asciinema: press <ctrl-d> or type "exit" when you're done
Now you can type any commands and all will be recorded. As you can see, to stop the recording type exit or press Ctrl + D. You can’t stop the recording while a process is running (like running a Docker/Podman container, but you can edit the asciicast later to show only what you want).
Some available command parameters:
--overwrite: overwrite the recording if it already exists.-c <command>: specify command to record.-t <title>: specify the asciicast title (useful when uploading to asciinema.org).-i <seconds>: add a terminal inactivity timeout.
Asciicast is saved in your working directory. Its content is similar to this:
{"version": 2, "width": 129, "height": 30, "timestamp": 1659456387, "env": {"SHELL": "/bin/bash", "TERM": "xterm-256color"}}
[0.021553, "o", "\u001b]0;ricardo@myarch:~/Documents/tests/asciinema\u0007"]
[0.022625, "o", "\u001b[?2004h[ricardo@myarch asciinema]$ "]
[1.214144, "o", "d"]
[1.276604, "o", "o"]
[1.567574, "o", "\b\u001b[K"]
[1.664558, "o", "\b\u001b[K"]
[1.960809, "o", "p"]
## truncated output
Asciinema records when each key is pressed and when each output line is displayed. This sample shows I type do and then I delete it and type p.
Playing a recorded asciicast
Run asciicast play <filename> to replay a recorded asciicast in the terminal. Don’t be afraid the first time you play an asciicast, it does not re-execute the commands you recorded, just replays the file (you can copy or move the asciicast file and play it wherever you want).
Sharing
You can upload the file to asciinema.org or to your own server/hosting. The web player allows to copy the text from the recording (just click ‘pause’ before).
Uploading to asciinema.org
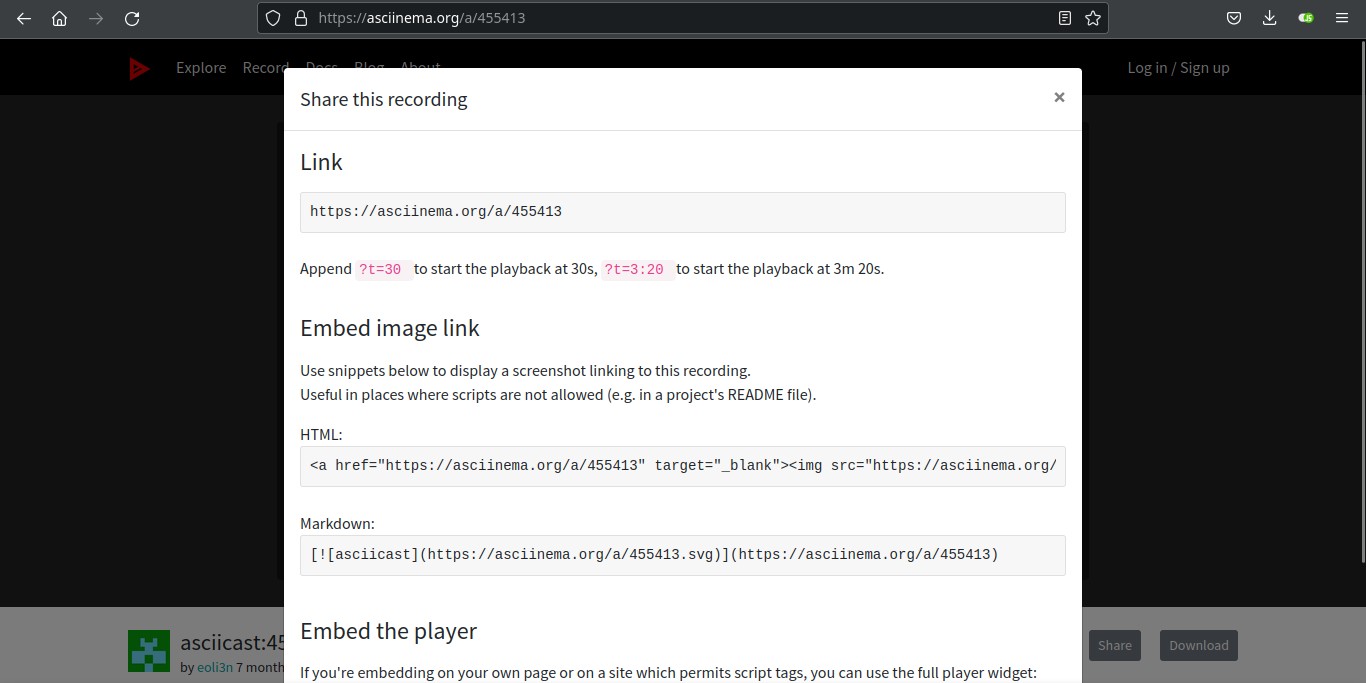
You can upload your recording to asciinema.org and you’ll get a link to a web player. Run asciinema upload <filename>.
You can share the link directly or go to that URL and click on ‘Share’ to get an embed player link to paste on your website or image links for places where scripts are not allowed.
You can create an account on https://asciinema.org/login/new to be able to manage your asciicasts. After account creation, run asciicinema auth to link the device to your account.
Uploading to your own server/hosting service
With just one CSS and one Javascript file you can self-host the web player and, therefore, don’t need to upload your asciicasts to asciinema.org. Download the files from https://github.com/asciinema/asciinema-player/releases. Place the JS and CSS files where you usually place these kind of files on your website and link to them in a HTML file. Place also your asciicasts files. For example, to link to the stylesheet:
<!DOCTYPE html>
<html>
<head>
<link rel="stylesheet" type="text/css" href="/asciinema-player.css" />
Add a div container where you want to place the player and add an id attribute.
<div id="demo"></div>Finally, link to the Javascript file and write a simple script:
<script src="/asciinema-player.min.js"></script>
  <script>
    AsciinemaPlayer.create('/test2.cast', document.getElementById('demo'));
</script>- Change JS path and asciicast path and filename if needed.
AsciinemaPlayer.createhas two parameters: asciicast file path, and thedivcontainer.
You may need to style the div container to suit your needs.
Sample (self-hosted)
{% include asciinema-script.html %}
If you have any suggestion, feel free to contact me via social media or email.
Latest tutorials and articles:
Featured content:

