Generating locally-trusted SSL certificates with mkcert
Table of Contents
When you need an SSL certificate for your local projects, you have two options: create self-signed certificates (that cause trust errors) or create your own CA (Certificate Authority) which validates the certificates. mkcert simplifies the process of creating a CA and the certificates.
Installation
Follow the instructions on https://github.com/FiloSottile/mkcert#installation. For Ubuntu, first install libnss3-tools:
sudo apt install libnss3-toolsThen, you can download the precompiled binary and copy it to /usr/local/bin:
curl -JLO "https://dl.filippo.io/mkcert/latest?for=linux/amd64"
chmod +x mkcert-v*-linux-amd64
sudo cp mkcert-v*-linux-amd64 /usr/local/bin/mkcert
Usage
Creating CA
The first time you use mkcert, you need to create the CA (Certificate Authority). Run (as root or with ‘sudo’):
mkcert -installmkcert automatically installs the CA on Firefox and Chrome/Chromium trust stores, but you can manually install it on your web browser. Execute mkcert -CAROOT to see the folder in which the CA files are stored.
$ mkcert -CAROOT
/home/ricardo/.local/share/mkcert
Then, go to your browser, find certificates settings and import a new Authority. Select rootCA.pem file.
Creating certificates
Now you can create the SSL certificates. Run (as root or with ‘sudo’):
mkcert <domain>$ mkcert local.rs1.es
Created a new certificate valid for the following names 📜 - "local.rs1.es"
The certificate is at "./local.rs1.es.pem" and the key at "./local.rs1.es-key.pem" ✅
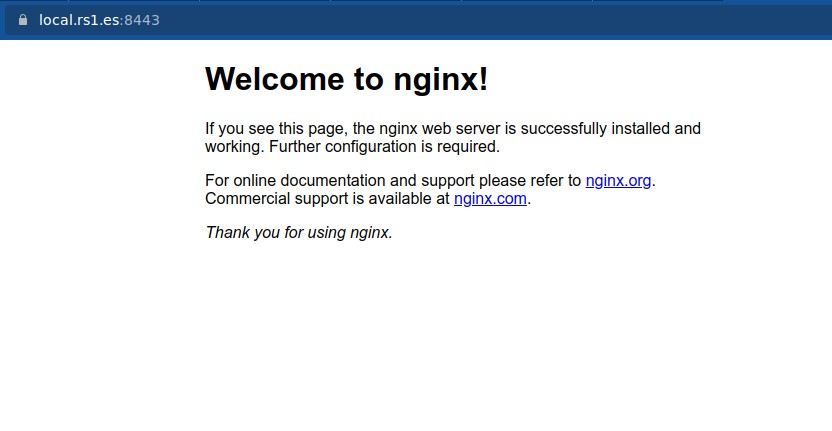
It will expire on 25 January 2025 🗓Now you can copy the certificate and the key wherever you want and configure your server to use them. For example, on NGINX:
server {
    listen 8443 ssl;
    server_name local.rs1.es;
    root /var/www/html;
    index index.html index.nginx-debian.html;

    ssl_certificate /etc/nginx/certs/local.rs1.es.pem;
    ssl_certificate_key /etc/nginx/certs/local.rs1.es-key.pem;
    ssl_protocols TLSv1.2 TLSv1.3;
    ssl_ciphers HIGH:!aNULL:!MD5;
}
You can add several domain names to the mkcert command (separated by spaces), including ‘localhost’.
If you have any suggestion, feel free to contact me via social media or email.
Latest tutorials and articles:
Featured content:

